PERFECTLY IMPERFECT-I may not be the best at what I do, but Nobody has MORE fun trying than I do! :)


Showing posts with label Paper Cutting. Show all posts

Saturday, November 17, 2012

Things I've Been Playing With This Week

I'm thankful that I like to dabble in a lot of different things. I never get bored or lack for something fun to entertain myself with. I've been dabbling with several things since I last posted. Following are a few of the works in progress that I'm working on.


Dollie Doll's paper sculpted face is coming along slowly. Can't wait to see her in hair and makeup! She will be a 36" cloth boudoir doll when she is finished.


A granny square afghan that I started around 15 years ago, hated sewing the squares together, got bored, and left laying until last week. I suddenly decided to finish it. I now have half the rows completed. I still HATE sewing the squares together! lol This is my first, and probably my last, granny square project. :/


I watched a paper cloth tutorial by Diana Trout and decided to give it a try. The bottom one is my first attempt and the top one my second. The cloth I used on the first one was a little too thick, but came out ok. I also used paper towels where I had wiped paint up, tissue paper, a phone book page that I had drawn a face on, a cut paper flower, and some rice paper on them. Now I can hand sew or machine stitch on them and use them in other projects. Since I was learning, I just used materials I had in reach, but I look forward to making some more using better materials.

 
I did a quirky doodle sketch just for fun! It took a while for the image to show itself amongst the pencil lines!


Playing and experimenting with my new gelli arts gel printing plate. These are a few of my trials, most of them are on toned card stock. I used stencils as masks and stamps on some. The browns on most of them is actually metallic copper, and I used mostly fluid acrylics and some heavier acrylics, whatever I could reach at the time.


Can you see the little copper stars in the blue around the butterfly above?


Metallic copper in the background on the butterfly above.


Metallic copper and turquoise. The stars are from the sole of an old house shoe, hence the footprint look.


A page of text that I had drawn a doodle face on with a marker. I used the stencil, after I pulled it from the plate, as a stamp to make her a mask. She looks a little wonky doesn't she?


Metallic copper, blue, and magenta in layers above.


Metallic copper and ultramarine blue above. The heart shape is cut from a clean piece of turkey netting.
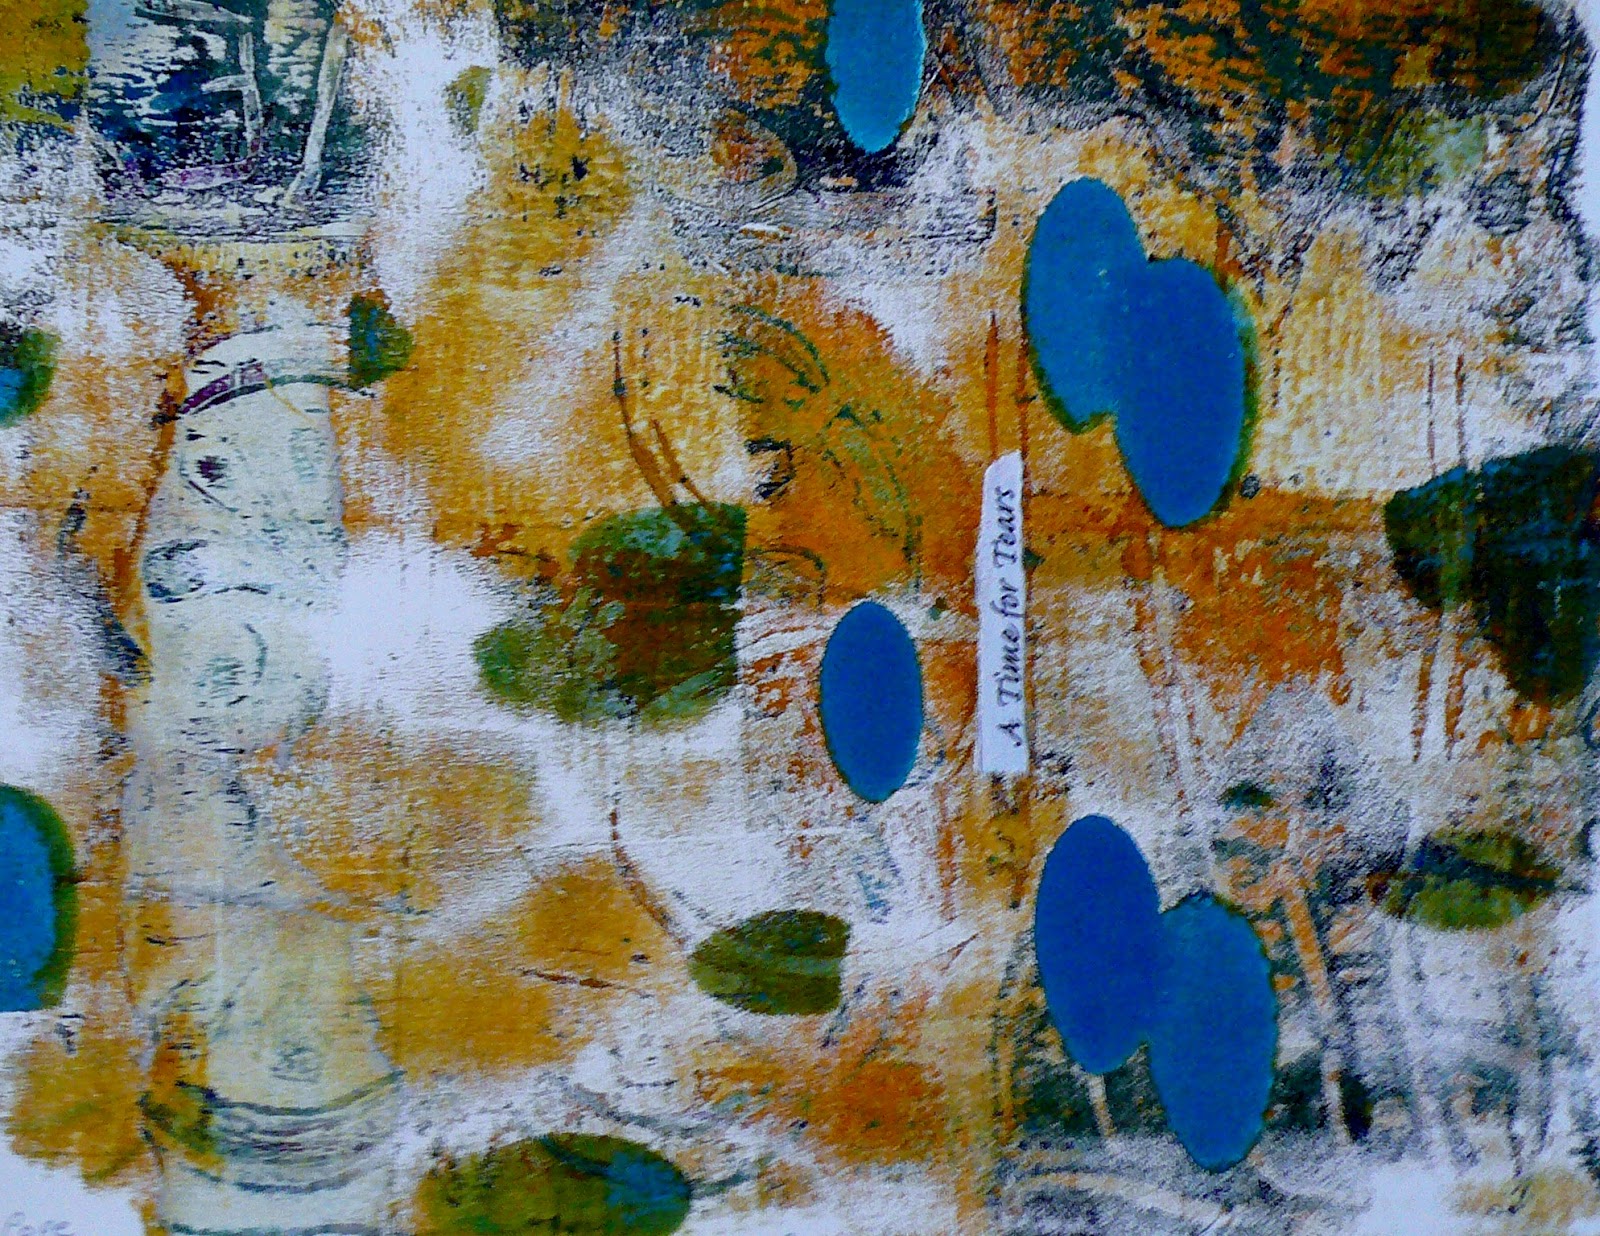
 
"A Time For Tears" is a few layers of turquoise, yellow ochre, olive green, and it picked up some color and line off the previous print, which gave it some added texture and depth. I collaged the text with the title on top. I'm thinking I may add a layer of wax over it. I'm not a great photographer, and it looks better in person. I love it!

Hope you've enjoyed seeing what I'm playing with as much as I've enjoyed the playing!

Happy Thanksgiving to all of you who celebrate it, safe travels, and enjoy your family and friends!

Sunday, August 5, 2012

21 Secrets Playground 2012

I was late joining the 21 Secrets Playground this session. It started in April and the classes will be available until Jan 1. I joined at the end of this week. You can click on the link to read about it and all the teachers and the classes they're teaching, all 21 of them. It's also on sale now, so that's a bonus. There's still time to sign up, and I can tell you there's a lot of things to learn there.

I did the classes a little differently this session. Instead of taking the classes and doing the work one at a time like I usually do, and because life is happening at warped speed right now, I have gone through all the classes, watched all the videos, read all the texts, and saved/printed off the pdfs in case something happens that I can't continue right now. I learned a lot just from doing that, but now for the fun part, to go back and actually do the projects. After all, the best way to learn something is by actually doing it, and that's the truth. :)

I did do these little mini projects that were relatively quick and easy because I just had to create something.


The little booklet made from a journal page background that I didn't particularly like is from a class with Dina Wakely called Intuitive Painted Layers, the paper cutouts are from a class with Alma Stoller called Child's Play 2, and the heart kleenex sculpture (was supposed to use toilet paper, but the kleenex was handy was from a class with Dale Anne Potter called Personal Acts of Kindness. These tiny projects were just a small portion of the classes, and I can't wait to do the rest!

I also did a journal page of doodles and a small mandala from the class Wisdom Circles with Dion Dior, but I forgot to take a picture. :/

There's also tons of inspiration in the forms of the photographs from the other members of the work they've done in the classes. Some awesome work being done, as well as playing, on the playground!

Monday, March 5, 2012

Journey Journal pages


The theme for these journal pages is "On my journey I need...", and they are inspired by Misty's workshop. In fact, this was the last class, and since I couldn't keep up with all the assignments as we went, I'm going back to do the ones I skipped, so there will be a lot of posts following that are inspired by Misty. I learned so much that I want to try, plus my head is spinning with new ideas and experiments. Between Misty Mawn, Katie Kendrick, and Connie Hozvicka's workshops I'm not likely to run out of art projects or ideas soon. Never mind the ideas from other places on the web!

Some of the best things I've picked up though are learning to let go of me during the processes and being fearless; not trying to achieve perfection, but character in my art through intuition; not being afraid to experiment and try, a new found confidence, and the knowledge that whatever I don't like can always be covered up with something else, or recycled into another piece. I'm better equipped to express myself and as Misty says, "Layer it until I love it."

This piece, for example, has tons of layers of paint, pencil, metallic pens, stamps, paper cut outs, pastels, transfers, doodling, black marker. In short, everything but the kitchen sink, and, who knows, I may decide to add it sometime. Anyway, I layered it until I loved it...at least for now. "On my journey I need" is written on the angel cutout and around the pages. Pastels gave it kind of a dusty look. I wish the metallic pen squiggles on the flowers and leaves showed up better in the photo, but it is what it is.

Hope something on here made you smile! :)


Go here to see the work of  some wonderful artists participating in Creative Every Day. Just click on their link and it'll take you right to their blog and some awesome work!

Tuesday, November 29, 2011

AEDM Day 29-Another Christmas Card Attempt

Another failed attempt at a Christmas card. After cutting the angel and layers and layers of stenciling, writing, and paint I gave up on this one too. :(


I like it in reality; not so much scanned to print. I'm going to have to think of something else, so it's back to the drawing board...again!

Only one day left in art every day month for this year. I missed maybe 3-4 days posting out of a month, so I consider myself successful. :)

Monday, November 28, 2011

AEDM Day 28-Christmas Card Prototype

My creative endeavor for this morning has been painting a sheet of gray cardstock with fluid acrylics and inks, adding writing, and cutting paper to glue on top. The original has bright colors and I like it a lot, but when I scanned and printed a couple of sheets the colors weren't near as vibrant and the writing looked sloppy.

I haven't made cards in a few years, but I'm inspired to do so again this year, and this was my first idea. I was going to add glitter and some other touches to the prints and hand write the verse on the  inside, but I don't see that happening now, and since I'm not going to use this one, I thought I'd go ahead and share it. So here tis!


The card covers opened up...


The card closed, front ...


Now, back to the drawing board! :)

Saturday, November 12, 2011

AEDM Day 12-Altered Record Album Back Cover Plus

I put my creative efforts today into the following three projects.

 I hand cut a couple of butterflies out of an old devotional book and dripped inks on them, then pasted them to the back of the altered album cover. The word GRATITUDE is across the top in gold metallic gelly pen. Washi tape was added to the spine and overlapped on both sides of the album. I have worked on this, adding and subtracting stuff, until I'm just frazzled, so I don't know if I'm calling it finished or not. Anyway, this is how it is right now. Except for maybe some tweaking here and there, I'm thinking my album file folder may be done. It's been a lot of work, but it's worth it. I like it!


I think I also finished this page today. It's one I had started during Katie's workshop. It started out as a self portrait in an outdoor setting and morphed into this, which looks absolutely nothing like me, but that's ok. It was a fun experiment, and I like her. Notice the pair of eyes looking over her? Her dress started out as a painted tee shirt, but I took an old embroidered scarf (I love the coarse material and crooked stitches) that I got at a yard sale, cut her a dress top, and used x heavy gel medium to paste it down. The blue between the eyes and the bow at her neck are a different fabric. Fun stuff!

Oh, yeah! There will be words on this one. I just haven't decided which ones yet. :)


This gallery canvas is in no way finished. I've had it started for a long time, but, for some reason, decided to play with it today while waiting for some gesso to dry. This started as one of my quirky doodle drawings and has already morphed a couple of times. It will probably morph a few more times before I quit on it. :) The middle heart has gold metallic strings like a harp/guitar, kind of, which she is plucking. I have no idea where it's going from here, but this is the way she is for now...

It's been a fun day of playing, but I'm tired and hungry, so I'm calling it a day. Have fun with your creative efforts!

Hope something on here made you smile. :)

Friday, November 11, 2011

AEDM Day 10 & 11-Altered Record Album Front Cover & Doodle

I worked on the album cover yesterday and today, and this is where it's at for now. I'm not completely happy with it, but I'm calling it done (unless I figure out what needs tweaking) and moving on.

I wish the copper metallic paint on the cross, the door knob, and the cat's eyes showed up better. It looks much better in reality, especially when the light hits it.


I also added some color to one of my left-handed character pages with with some water soluable oil pastels and crayons, quickly and loosely, for a base page.

Several of you have commented on the record album idea. I put it on a couple of other posts of the album, but, in case you missed it, mine was inspired by a project in the Layered Impressions workshop with Katie Kendrick, which I took online during October. So, even though it's not the same as hers, I got the idea from her. :)

I still lack the back cover, and it will be done, but I'm feeling the itch to do something else for a day or two, so we'll see how that goes. Either way, I'll be enjoying it! :)

Tuesday, November 8, 2011

AEDM Day 8-Altered Record Album Cover

In case I don't get anything else done creatively today, I'm posting what I have done this morning. The cover of my front record album cover has gone from this...


to this. The cross, which is a paper cutting, isn't showing up, but it now has a layer of metallic copper on it. I'm liking the whole thing better already, but I'm not finished yet. Who knows what will evolve in the next session? Not me! :)

Monday, November 7, 2011

AEDM Day 7-Altered record album


This is the inside front cover of my altered record album, inspired by Katie in her Layered Impressions workshop, and I have worked on it some for three days now. I wish I had thought to photograph it at the end of each session and post it, but I didn't. It's gone through a lot of transformations and layers over the past three days. Somehow, the Amish looking women I started out with (see day 1) transformed into burlesque looking women, who morphed into puppets, of a sort. The buttons and lace are glitter glue if you can't tell.

It's wonky and quirkey and I like it! lol

Hope it made you smile too! :)

Tuesday, November 1, 2011

AEDM Day 1- WIP Altered Record Album File

Today is the first day of art every day month, hosted by Leah Kolidas @ Creative Every Day. This is a work in progress that I started in Katie Kendrick's workshop. I didn't have one of those nice 78 record album covers with several sleeves in it, so I improvised by taking a regular double record album cover that I had on hand and gluing a sleeve in the middle.


The cat is the front cover and the tulip is the back cover. I took some of the paint off the front cover today. All of the sides are comprised of layers of paint, altered magazine images, journaling, drawing, stenciling, cut papers, stamping, and whatever else strikes my fancy. The images may look nothing like these when they are finished. I just add and subtract until I get the image I like, and most of the time the finished piece looks nothing like the started one. I love the element of surprise at how they turn out and how much I can relate to them. I guess that's where my intuition and wonkiness comes in. :)


Inside the front cover and front side of the sleeve. I did some more collaging and drawing on both. Some of the drawings were done with my non-dominant hand, adding to the wonkiness.


Back side of sleeve and inside back cover where I did some more collaging today. I also sprayed espresso ink on the sleeve and re-drew the bird, because I hated the colors I had on the background. Now I have it too dark and brown to suit me, but I'm learning and having fun. All six sides still need a lot of work,  but when it's finished I'll have a file with three large pockets to hold my treasures.

So that's my art effort for today! Looking forward to playing all month with you all! :)

Monday, September 5, 2011

Still Playing With Gelatin Prints

A few more of the prints I've pulled from a gelatin plate over the weekend. I made several more, but these are my favorites. So far, I have a total of 48 prints. Some will probably wind up as journal backgrounds and others will probably be cut up into smaller formats for other uses.

I made a smaller printing plate for these, which allowed for a white border on all four sides, even if they didn't get scanned that way. These happen to all be on printmaking paper.


Acrylic inks, using a plastic doily and an original stencil...


A ghost image of the first print, using a dog and fiber masks...


Acrylic inks, using a brush handle to draw into the ink...


Fluid acrylics, using a plastic doily and a wild turkey feather...


Acrylic inks, using an original cut out mask and a wild turkey feather...


Acrylic inks, using a plastic doily and a turkey feather...


Printer's ink, using the plastic doily, a bottle bottom, and brush handle writing...


Printer's ink, using an original mask and stencil...


Fluid acrylics, using the doily, a handmade stamp, and an original stencil...


Ghost image of the above print, using dog and tulip masks.

These are so much fun to make, and they look much better with a white border around them, so I can't wait to try a white mat on the ones I shared in the previous posts, where the print covered the whole paper.

I think I'm beginning to get the hang of it now! :)

Thursday, September 1, 2011

More Gelatin Prints...And a Boo Boo or Two


Okay, this is the first print I pulled off a new gelatin plate that I had mixed up, let set, covered with tin foil, and set in the fridge overnight. I used acrylic inks instead of the fluid acrylics I used on the others. The inks worked fine, but the gelatin plate was a disaster. When I removed the tin foil, it had stuck in one place to the gel, but didn't pull any off, so that was ok. The underside of the foil, however, was covered in condensation, which had dripped onto the gel. I dried it off with a paper towel and rolled the ink onto the plate, placed my objects, and pulled a print onto my speedball printmaking paper.

This print pulled off fine, and I like the colors and patterns, etc. I was tickled with how well the inks worked.


So I quickly pulled a ghost image. Not so tickled with the image, but it can still be used. By the way, I'm playing and experimenting, so I quickly cut the masks out myself. Didn't worry about making them perfect. :o


I tried different colors and layed a large bandage gauze across the left side for texture. Unfortunately, the gel didn't pick it up and I had a large blank white space on the print, so I re-inked that side of the plate, added some masks, and re-printed. I also used a piece of lace in the corner.

I like this one okay. But now the gel plate, despite my wiping it off between prints was getting really tacky. A thin layer of gel pulled off in spots onto the print.


I tried thalo green and metallic copper on this one with a mask and some eyelash yarn. I was so disgusted with the tacky gelatin that I didn't really try on this one, and when I pulled it up, the gelatin just started coming apart on me, and I was done with it. Threw it out the door! :/


I was still wanting to play, so I rolled inks directly onto the metal cookie sheet and pulled a print. I wouldn't want to make a lot of these, but it'll make a good background for something, and I see interesting shapes in it, so I'll keep it in my stash.

As for the gelatin printmaking, I'm not giving up. I figured out that the condensation from the foil added water to the gelatin, causing it to weaken and get tacky, so I know not to do that again! :o I didn't cover the plate I made before this one and it did fine for 2-3 days, although I overmixed my paints and the prints turned out a little muddy and blah. I'm going to make another gelatin plate and print another layer on top of some of my first ones for more interest. We'll see how that turns out!

Boo boos are great for learning and remembering what you learn! Don't be afraid to try! :)

Sunday, July 17, 2011

3 Little Words Poetry Journal Pages-21 Secrets 2

These pages were inspired by Aimee in her 21 Secrets workshop Three Little Words. I learned how to take word strings and create poetry and a journal page with them. I love this class. It's one of my favorites, but I would hate to  have to pick THE favorite workshop from all of them, because I have learned from and enjoyed them all, and I still have 5 to take.

I've been taking a little break to do some cleaning and stuff that needed doing badly. When I do art, write, listen to music, or read, I tend to ignore everything else, but eventually I have to play catch-up, or at least clear a path for walking. :) My workspace is also in shambles, because I started organizing and cleaning, and right in the middle of it I got sidetracked and haven't gotten back to it. Right now, I can't find anything, and I wouldn't have a space to work if I could. So I'm catching up on my reading until I get re-situated and back into my journaling.

I have discovered the world of electronic reading via Kindle on my pc. Love it! I read "God Don't Like Ugly" by Mary Monroe a couple of weeks ago, which was hard to put down, and I'm now reading "The Craggy Hole In My Heart And The Cat Who Fixed It" by Geneen Roth, also very hard to put down. I purchased these two, but there are tons of free ebooks and short stories that look interesting on Amazon, and I've downloaded a couple of those, as well.

Whoops! I got sidetracked again, but when I find something that I enjoy I love to share it. :)


All three pages are on 8 1/2 x 11" cardstock, the phrases are from Anne Rice's book, "Violin (I love Anne Rice!)," and I used fluid acrylics in different ways, such as fingers, brush, spray, stamping, etc. I kind of overdid the background on this one, I think, and the gold glitter butterfly and swirls don't show up in the scanned image as pretty as they are, but you get the idea.The face was drawn and painted over the background, but before the bubble wrap and the glitter glue. The journal phrase is in the necklace around her neck, and it says, "Dizzying golden swirls Touched her check."


This page also has collaging and cut-out butterflies, one from scrapbooking paper and one from a text page, a page from an old dream dictionary, and black "stitching" with a Pitt pen. The poem says:

I reached out full of hope
Just to rest, to be free
The words melted like a veil from my soul
Stood in fear, shut my eyes in the rain
Caught the light, opened my eyes
No longer afraid of all memories or the unknown

Stomped my foot!

Confessed with laughter!


For some reason, I am really into purple and pink this summer. What do you suppose that means? Anyway, I used pages from the old dream dictionary to collage the background, sprayed them with thinned fluid acrylics, then added some torn shapes from the same book that I had already painted pink over a resist word (Faith) on at the bottom. I cut the upper butterfly from one of the pages and used it as a stencil negative to spray over, leaving the bottom butterfly pinkish and the top one purple. Again, I used a black Pitt pen to "cross-stitch" the torn paper with the poem to the page. I'm not sure I'm finished with this page. It seems to be calling for something else, but I'm not sure what just yet. I love my poem though! The poem says:

A dipped pen
Grand purple ink
Just the moon, mellow and soft
Caught in transcendence
Expressed my soul in that moment
Shut my eyes
Let it go


These pages got covered up, along with my friend's birthday card, for a few weeks, during the re-arranging of my work space, and I just found all of them a couple of days ago, a week after my friend's birthday. :/  So she now has her card, and I can share another of my workshop projects with you.

I hope you enjoyed your visit and that something on here made you smile just a little. :)

I'll be back soon!

Monday, May 30, 2011

Me and My Shadow and Adding Dimension-21 Secrets

These are journal pages inspired by the workshops Me and My Shadow with Violette Clark and Adding Dimension with Kelley Brown. I did mine on cardstock and used a variety of techniques learned in other 21 Secrets workshops in the background, as well. There is also a lot of emotional work involved before the doint the art, and I'm loving all the different processes I'm experiencing. Can you tell that I'm excited about these workshops? LOL


The first page is my society face, along with labels for the characteristics I tend to portray around other people. I tried to use lighter brighter colors for my "sunny" side. My labels are written on the butterfly and the stems. I wasn't aiming for a smirky smile, but that's how it turned out. I don't think I look smirky in public, at least, I hope not! Reckon my subconscious is trying to tell me something? :)

This is my shadow side. The side I try to keep to myself and hidden from other people, although I'm not too good at hiding things. I have one of those faces that shows whatever I'm feeling, no matter how much I'm trying not to show it. :/ For some reason, in this series of workshops, I've been drawn to a lot of purple and magenta/pink color, although this one isn't actually quite as purple as it looks here. I don't know what that's about. I'm usually a blue/orange person, but I guess everything changes around at one point or another.

This page also contains a sewn on pocket to hold secrets that I want to hide and on the left is a flap, held on with cheetah duck tape, that lifts up for more personal writing. These ideas came from Kelley Brown's workshop, along with some other great ideas. You will probably see more from her class as I go along. :)

The faces and the butterfly were created on a seperate piece of cardstock and attached with gel medium. I have also used hand made stamps, stencils, cutouts, spray color, torn papers, writing, etc among the layers in the backgrounds.

Both these classes were a lot of fun. I would hate to have to pick a favorite from the fourteen I've taken so far. And I still have two to finish and five to start!

Connie just sent out an email that she's extending the workshops until the end of the year. Registration has been extended until Oct 1. So there's still time to participate if you're interested!

These workshops are deeper and more involved than the last round, and I, for one, am happy about this. I was beginning to wonder if I was going to get through them all before August and get what I needed to out of them. Now, I will have time to re-visit all the workshops and catch up on any new videos or ideas that have been shared and participate more in the classrooms.  Yippeeeeeee!

Have fun with ART! :)

Sunday, April 24, 2011

Becoming Brave

I also completed Erin Knepp's workshop Becoming Brave and came away with a lovely little journal and a lot of encouragement. Erin is not a big talker, but her words speak volumns. I enjoyed this workshop very much, and will be adding more to my journal as I go along.

So here are the pages I created and I became braver with each page. I chose to use a square format, for a change. I used metallic paints on some of the backgrounds and some of the stitching, etc, which, unfortunately, the scanner doesn't pick up very well, but you'll get the idea.

 Front Cover...


 This page shows that I am loved. I am 61 years old, and for my last birthday my mom gave me a card with a kitten on it. I used the face, heart, and glittery flower on the page to represent her. My dad is no longer with us, but he loved tulips, so I added magazine page tulips. We've lived in the Rabbit Hop community since I was two years old, thus a little bunny seemed appropriate. My husband of 41 years brings me much joy (and sometimes frustration) so I added a little joy button. I have been very blessed, because I've always known I was and am loved.
 I used a couple of paper cuttings on this one. The cross was cut from a coffee filter, which didn't show up much when I  used gel medium over it, so I painted it metallic blue. The star was cut from a text page. I'm still using things I learned in the first 21 Secrets. Papercutting was one of my favorites! :)

Back cover-Don't you just love the three kitty stamp? I got it in a stash swap that I participated in a couple of months ago. I can't imagine why the lady parted with it, but I'm glad she did! :)

These look much better in person, because the metallics shine and add a little glitz to them.  Anyway, it was a wonderful class. Thank you, Erin, for the encouragement and the experience! What I learned will become a part of me from now on. :)